Everyone loves a bright, white smile. It boosts confidence and leaves a lasting impression. Luckily, there are many ways to whiten your teeth, from everyday products to professional treatments. Here, we’ll explore the top ten tips to help you achieve a dazzling smile.
Key Takeaways
- Whitening toothpaste is an easy way to remove surface stains and keep your teeth looking bright.
- Whitening strips are convenient and can effectively lighten your teeth in just a few days.
- Whitening gels offer a more targeted application and can be very effective for stubborn stains.
- Whitening trays, often provided by dentists, offer a more customized and thorough whitening experience.
- In-office teeth whitening by a professional can deliver the most dramatic results quickly.
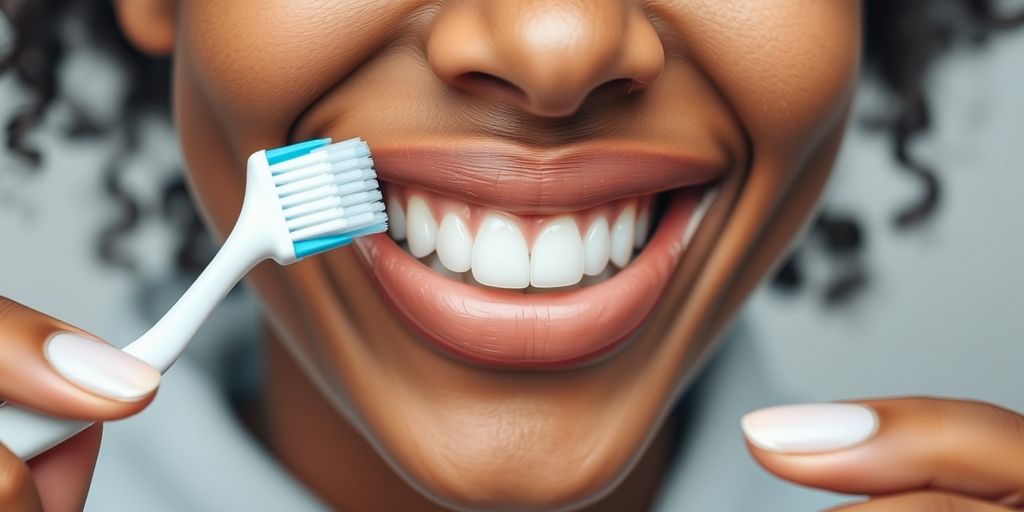
1. Whitening Toothpaste

Whitening toothpaste is a popular choice for those looking to brighten their smile. These toothpastes contain mild abrasives and chemicals that help remove surface stains and lighten the color of your teeth. With regular and consistent use, you’ll start to see a difference over time.
When choosing a whitening toothpaste, look for one that has the American Dental Association (ADA) seal of approval to ensure its safety and effectiveness. It’s important to note that whitening toothpaste can only remove surface stains and may not be as effective for deep stains or discoloration.
- **Key Ingredients to Look For: **
- Peroxide
- Baking Soda
- Activated Charcoal
- Mild Abrasives
Make sure to brush all surfaces of your teeth, including the front, back, and chewing surfaces. Additionally, don’t forget to brush your tongue to eliminate bacteria and freshen your breath.
For those with sensitive teeth, it’s crucial to choose a gentle formula. Luckily, Crest Gum & Sensitivity Gentle Whitening Toothpaste brightened our smile comfortably with no increased sensitivity during testing.
2. Whitening Strips
Whitening strips are a popular and easy way to brighten your smile. These thin, flexible strips are coated with a gel that contains hydrogen peroxide, a common bleaching agent. You apply the strips directly to your teeth and leave them on for about 30 minutes. With regular use, you can see noticeable results in just a few days.
How to Use Whitening Strips
- Read the Instructions: Always follow the manufacturer’s guidelines to avoid any issues.
- Apply the Strips: Place the gel side against your teeth and press gently to ensure they stick well.
- Wait: Leave the strips on for the recommended time, usually around 30 minutes.
- Remove and Rinse: Take off the strips and rinse your mouth to remove any leftover gel.
Benefits of Whitening Strips
- Convenient: Easy to use at home without any special tools.
- Effective: Can lighten teeth by several shades with consistent use.
- Affordable: Generally cheaper than professional treatments.
Drawbacks of Whitening Strips
- Temporary Sensitivity: Some people may experience tooth sensitivity or gum irritation.
- Limited Coverage: Often only cover the front teeth, missing the back ones.
- Consistency Needed: Requires regular use to maintain results.
Whitening strips are a great option for those looking for a simple and effective way to brighten their smile. However, if you experience any discomfort, it’s best to take a break and consult your dentist.
For more information on maintaining good oral health, check out our article on [5 reasons you should see your dentist right away](https://www.example.com/5-reasons-you-should-see-your-dentist-right-away/).
3. Whitening Gels
Whitening gels are a popular choice for those looking to brighten their smile. These gels are typically applied directly to the teeth using a brush or a pen applicator. They contain either hydrogen peroxide or carbamide peroxide, which helps to bleach the teeth and remove stains.
Key Benefits of Whitening Gels
- Precision Application: Whitening gels allow for more precise application compared to strips, making it easier to target specific areas.
- Effective Results: With regular use, whitening gels can produce noticeable results in a short period.
- Convenient: These gels are easy to use and can be applied at home without the need for professional assistance.
Whitening gels are a great option for those who want to achieve a brighter smile without the hassle of visiting a dentist.
However, it’s important to use these products as directed to avoid potential side effects such as tooth sensitivity or gum irritation. For the best results, consult with your dentist before starting any whitening treatment, especially if you plan to use very strong gels like those containing 44% carbamide peroxide.
How to Use Whitening Gels
- Brush and floss your teeth to remove any food particles and plaque.
- Apply a small amount of gel to the brush or pen applicator.
- Carefully apply the gel to your teeth, focusing on areas with stains.
- Leave the gel on for the recommended time, usually between 15-30 minutes.
- Rinse your mouth thoroughly with water.
- Repeat the process as directed, typically once a day for a week or two.
Remember, overuse of whitening gels can lead to temporary sensitivity or irritation. If you experience any discomfort, take a break from the treatment and consult your dentist.
4. Whitening Trays
Whitening trays are a popular choice for those looking to brighten their smile at home. These trays are custom-fitted to your teeth and filled with a whitening gel. They are worn for a set period, usually several hours or overnight, and can be very effective at removing deep stains and brightening teeth several shades.
Key Benefits of Whitening Trays:
- Custom-fitted for better results
- Higher concentration of whitening agents
- Effective for deep stains
How to Use Whitening Trays
- Visit your dentist to get a custom-fitted tray.
- Fill the tray with the recommended amount of whitening gel.
- Wear the tray for the specified time, usually several hours or overnight.
- Remove the tray and rinse your mouth and the tray thoroughly.
Whitening trays offer a balanced approach between over-the-counter strips and professional treatments, providing noticeable results with proper use.
Important Considerations
- Follow the instructions provided by your dentist or the product manufacturer.
- Be aware of potential tooth or gum sensitivity.
- Consult your dentist if you experience any discomfort.
For more information on teeth whitening options, you can visit the American Dental Association or consult with your local dentist.
5. In-Office Teeth Whitening
In-office teeth whitening is a professional treatment done by a dentist. This method is known for its quick and effective results. Here’s what you can expect:
- Single Visit: Unlike other methods that require multiple applications, in-office whitening usually needs just one visit.
- High-Concentration Gel: A strong hydrogen peroxide gel is applied to your teeth.
- Special Light: A special lamp or laser is used to activate the gel, speeding up the whitening process.
- Immediate Results: You can see a noticeable difference in just about 90 minutes.
Benefits
- Fast Results: Achieve a brighter smile in a single visit.
- Less Sensitivity: The controlled application reduces the risk of tooth or gum sensitivity.
- Professional Supervision: The procedure is done by a trained dentist, ensuring safety and effectiveness.
Considerations
- Cost: This method can be more expensive than at-home treatments.
- Maintenance: To keep your teeth white, you may need to avoid staining foods and drinks and consider touch-up treatments.
For those looking for the fastest way to a brighter smile, in-office teeth whitening is a top choice. It combines professional care with immediate results, making it a popular option for many.
For more information on optional dental procedures that enhance smiles, check out our top 5 optional dental procedures.
6. Oil Pulling

Oil pulling is an ancient practice from India that involves swishing oil in your mouth to clean and whiten your teeth. This method has gained popularity recently due to its simplicity and natural approach.
To try oil pulling, follow these steps:
- Take a tablespoon of coconut oil.
- Swish it around your mouth for 15-20 minutes.
- Spit out the oil and rinse your mouth with water.
Oil pulling can help remove bacteria and plaque, leading to a brighter smile over time. While there isn’t strong scientific evidence to support its effectiveness in whitening teeth, many people find it a pleasant addition to their oral hygiene routine.
Oil pulling is the practice of swishing oil around your mouth to clean and whiten your teeth, which has roots in ancient Indian medicine.
7. Baking Soda
Baking soda is a natural abrasive that can help remove surface stains from teeth. To use baking soda for teeth whitening, simply mix a small amount with water to form a paste and brush your teeth with it once a week. Be careful not to overuse baking soda, as it can be abrasive and potentially damaging to tooth enamel.
8. Hydrogen Peroxide
Hydrogen peroxide is a common ingredient in many teeth whitening products. It works by breaking down stains on the surface of your teeth, making them appear whiter. However, using hydrogen peroxide at home can be risky if not done correctly.
Benefits of Hydrogen Peroxide
- Effectively removes surface stains
- Easily accessible in various forms like gels and strips
- Often used in professional dental treatments
Risks and Precautions
- Can cause tooth sensitivity and gum irritation
- Overuse can damage tooth enamel
- Always follow product instructions carefully
If you’re considering using hydrogen peroxide for teeth whitening, it’s best to consult with your dentist first. They can provide guidance on safe usage and recommend the best products for your needs.
9. Activated Charcoal

Activated charcoal has become a popular choice for teeth whitening. This fine, black powder is believed to absorb surface stains and toxins from your teeth, giving you a brighter smile.
How It Works
Activated charcoal works by binding to the stains on your teeth. When you rinse it away, the stains are supposed to go with it. However, scientific evidence supporting its effectiveness is limited.
How to Use It
- Wet your toothbrush and dip it into the activated charcoal powder.
- Brush your teeth gently for 2-3 minutes, focusing on stained areas.
- Rinse your mouth thoroughly with water until all the charcoal is gone.
- Use it 2-3 times a week for best results.
Pros and Cons
Pros:
- Natural and chemical-free
- Affordable and easy to find
Cons:
- Can be messy
- Limited scientific evidence
- Potentially abrasive to tooth enamel
While activated charcoal can be a fun and natural way to try whitening your teeth, it’s important to use it cautiously and not overdo it. Always consult your dentist before starting any new teeth whitening regimen.
10. Apple Cider Vinegar
Apple cider vinegar (ACV) is a popular natural remedy for teeth whitening. Its acidic nature helps remove stains and discoloration from the teeth. Here are some tips on how to use ACV for a brighter smile:
- Dilute It: Always mix ACV with water before using it on your teeth. A common ratio is one part ACV to two parts water.
- Swish and Spit: Swish the diluted solution in your mouth for about 30 seconds, then spit it out. Avoid swallowing the mixture.
- Rinse Thoroughly: After using ACV, rinse your mouth with water to remove any remaining acid. This helps protect your tooth enamel.
- Limit Use: Use ACV no more than once or twice a week to avoid damaging your enamel.
While ACV can be effective for teeth whitening, overuse can lead to enamel erosion. Always use it sparingly and follow up with a good oral hygiene routine.
For more information on natural teeth whitening methods, you can visit Healthline or WebMD.
Conclusion
Achieving a brighter smile is easier than you might think. By following simple tips like brushing regularly, avoiding stain-causing foods and drinks, and considering professional treatments, you can make a big difference in the appearance of your teeth. Remember, the key to a whiter smile is consistency and good oral hygiene. So, start today and enjoy the confidence that comes with a brighter, healthier smile!
Frequently Asked Questions
What is teeth whitening?
Teeth whitening is a way to make your teeth look whiter and brighter. It can be done using special products or treatments that remove stains and discoloration from your teeth.
How do whitening toothpastes work?
Whitening toothpastes have special ingredients that help remove surface stains on your teeth. They can make your teeth look a bit whiter with regular use.
Are whitening strips safe for my teeth?
Yes, whitening strips are generally safe if used as directed. They contain a mild bleaching agent that helps lighten the color of your teeth.
Can I use baking soda to whiten my teeth?
Yes, you can use baking soda to help whiten your teeth. It acts as a mild abrasive that can remove surface stains. But don’t use it too often, as it can wear down your enamel.
Is professional teeth whitening better than at-home kits?
Professional teeth whitening is usually more effective and faster than at-home kits. A dentist uses stronger bleaching agents and can give you better results in a shorter time.
What foods should I avoid to keep my teeth white?
Try to avoid foods and drinks that can stain your teeth, like coffee, tea, red wine, and dark berries. If you do consume them, brush your teeth or rinse your mouth afterward.
How often should I whiten my teeth?
It depends on the method you choose. Some at-home products can be used daily for a few weeks, while professional treatments might be needed only once or twice a year. Always follow the instructions or ask your dentist.
Can oil pulling really whiten my teeth?
Oil pulling can help remove some surface stains and improve oral health, but it’s not as effective as other whitening methods. Swishing coconut oil in your mouth for 15-20 minutes can help clean your teeth and gums.